Technical Description Final Draft

“Power laces…alright.” Ever since Marty McFly gave a glimpse of the future, people wondered if they will ever get anything close to the technologies presented in 1989, Back To The Future II, movie. When he travels to 2015, one of the technological innovations he encounters in self-lacing shoes. Nike became one of the first companies to produce a self-lacing pair of sneakers. They came out with two models: the Nike Air Mags and the Nike HyperAdapt 1.0.

Fig 1 – Nike Air Mags 
Figure 1 shows the Nike Air Mags which were the first pair of self-lacing shoes produced by Nike, directly inspired by the Back To The Future movie. However, Nike made only 89 pairs of the Air Mags for the whole world. In addition, one had to enter in a raffle to even buy a pair. Due to the limited production and special requirements to buy these shoes, the Air Mags are more for sneaker collectors. Conversely, the Nike HyperAdapt 1.0 look a lot like a typical Nike shoe and not as flashy as the Air Mags. These are also a lot more accessible to the normal public.
The HyperAdapt retail at $720 which almost ten times the price of an average pair of sneakers. However, they do a lot more than just protect your feet. Also, many of us do not appreciate the privilege of being able to bend and tie our own shoes. There are a lot of people in this world who are not able to tie their shoes due to some disability. For people like those, these shoes are priceless.
There are several components that work together to make these shoes work and a detailed description of these components is written below.
Laces
There are two plastic channels that are connected to the motor unit which houses the Flywire (1, Fig 3). The Flywire are the wires that tighten and loosen the laces. Since these shoes do not have typical laces typical laces, the team had to think more creatively. These wires run through the visible laces on the top part of the shoe. The laces are made of Polyethylene cable sheathing which is an insulation material. In this case, it is used to withstand the daily wear and tear.
Side Buttons
There are two buttons (2, Fig 3) on the outer side of each shoe. These buttons are made up of rigid PCBs which is Polychlorinated Biphenyl, a typical plastic. This type of plastic gives the tactile feel when the button is pressed. Even though the shoes have a pressure sensor to automatically tighten the laces, if the user feels that the fit is not right for them, they can use these buttons to adjust the laces manually to your desire. One button tightens the laces while the other loosens it.
Pressure Sensor
One of the major components of the self-lacing mechanism is a pressure sensor (3, Fig 3). The sensor is taped onto the clear case (5, Fig 3) that house other electrical components. The sensor senses the pressure being applied to the heel of the shoe and then sends the signal to the motor (7, Fig 6) and the gearbox (6, Fig 4) to pull the flywire that tighten the laces. Without the pressure sensor, it would not be able to just slip your feet in the shoe and go.

Fig 3 – Components
Heel Lights
The heel lights (4, Fig 3) are located on the back of the shoe. It is a strip of five LEDs made up of rigid-flex PCB and is controlled by an IC or Integrated circuit. An IC is a small electronic circuit that performs certain specific tasks for a specific component. In this case, the IC tells the LEDs to light up when the lacing mechanism is in action. There are many types of LED strips available in the market. The one used in this case has a copper coating absorbs excess heat.
Main Electronics Assembly
The main electronics assembly is housed in a clear polycarbonate case which is about 2.5L x 2W x 0.5H. A polycarbonate is a group of thermoplastic that contains Carbonate in its chemical structure. This helps make packaging that protects the delicate electronics much stronger. Also, the working temperature condition of polycarbonate is from -40 degrees Celsius 115 degrees Celsius which makes it ideal for outdoor use. The packaging contains several components like the battery, motor, gearbox, winding mechanism, and an array of magnets and induction coil.
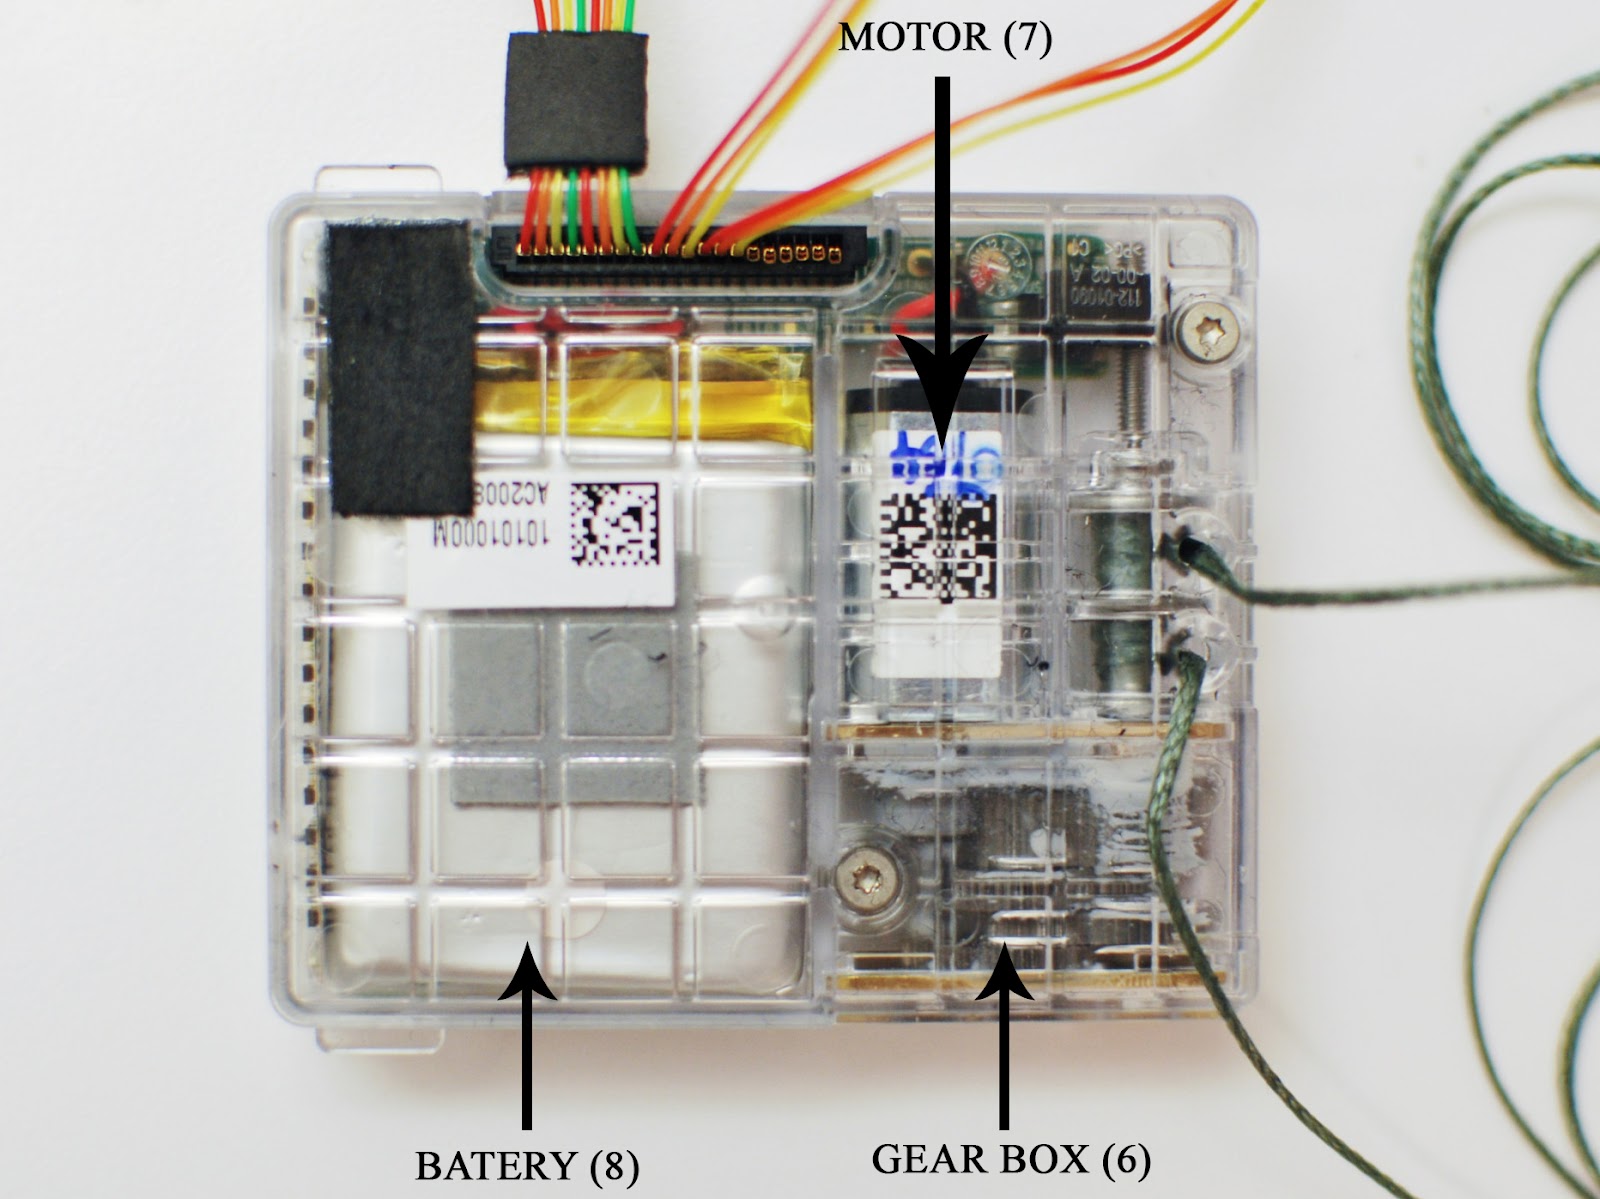
Fig 4 – Electronics Assembly

Gearbox and Motor
The gears used in these shoes are higher quality, made up of a steel than either plastic or brass alternatives. Instead of using steel to make the gears, they could have been made of plastic or brass which are not as durable as steel, but also cheaper to manufacture. A set of multiple gearbox work together which are drive by the motor, also housed in the clear case. The motor spins either clockwise or counterclockwise whether the signal is to tighten or loosen the laces.
Magnets
On the bottom side of the clear casing, there is an array of eight magnets(9, Fig 5) in a circular pattern. These magnets attach to the included proprietary charger that is used to charge the batteries up. The shoes follow the Qi wireless charging standard and the magnets are used to hold the charger in place while the shoes are being charged.
The Processor
The brains of this whole system is ARM Cortex M4 processor (10, Fig 6). The processor was designed to provide digital signal control with efficient and easy to use way. The processor handles the task from lighting up the LEDs to operate the motor and gearbox that pulls the flywire. Even though M4 packs more power than the system actually needs, it is highly efficient and can run on much less power.

Fig 6 – Open Electronics Assembly
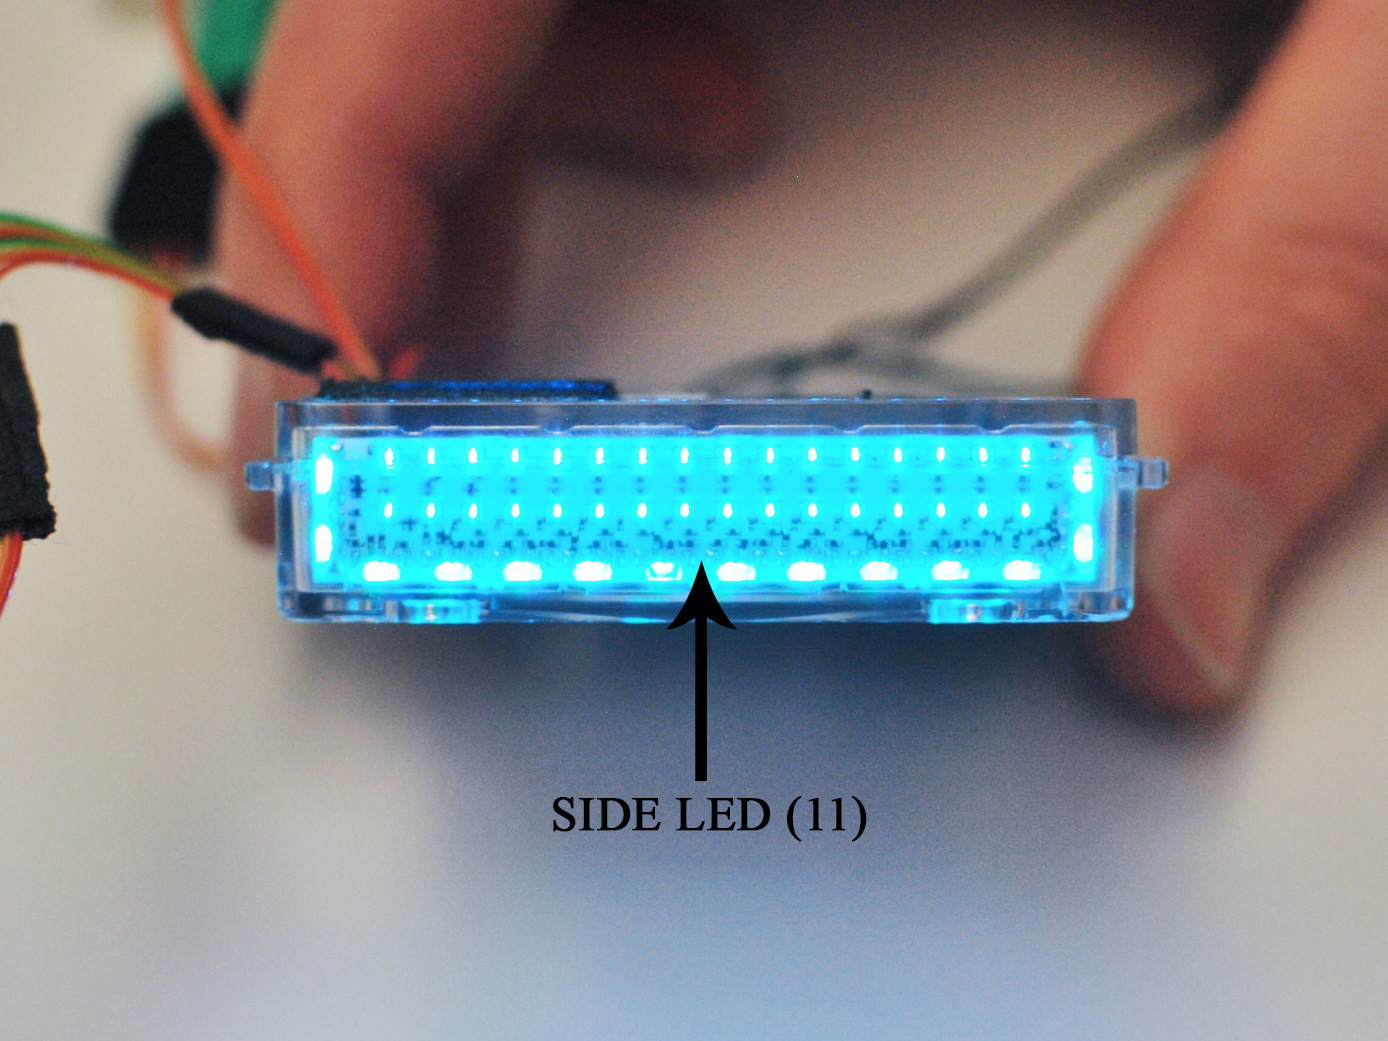
Fig 7 – Side LED Assembly
Side LED Lights
On the side of each shoe, there is a glowing teal colored LED light (11, Fig 7) that make the shoe look futuristic. To make this work, Nike put an array of 32 LEDs that give the give. The benefit of choosing such a number of LEDs is that it gives that diffused uniform glow, instead of these dot glows. If they only used 5 bigger LEDs, the effect would not have been achieved.
Wireless Charger
Since, the shoes need to be charged regularly, instead of choosing regular micro-USB port to charge the shoes, Nike opted with a proprietary wireless charger. They follow the Qi wireless charging standard that many other products in the market follow as well. Qi standard is an open interface standard that defines wireless power transfer using inductive charging up to 5W. The induction coil(11, Fig 5) produces an electromagnetic field that converts energy into electricity to charge the batteries. Using a standard way of charging the shoe,s benefits third-party developers can make their own charging solution. In short, the possibilities are open by using a standard system.
When all these parts are combined together, the user gets a seamless experience of just slipping their feet in the shoes and the shoes tying themselves. But, how does the entire process work? When the user put on the shoe, the pressure sensor in the heel senses the weight of the person and then accordingly send the signal to the processor. The processor processes the information received by the pressure sensor and then triggers the motor and the gearbox to pull the Flywire that tightens the laces. If the user’s preference is not met by the sensor, the user can manually adjust the tightness of the laces using the buttons on the side. The same process repeats, the buttons sends the information to the processor and appropriate action is taken. In addition, every time the lacing mechanism is activated, the heel lights also turn on. For the aesthetic purpose, the side LEDs are also powered on to provide a diffused teal colored glow.
In conclusion, Nike HyperAdapt 1.0 is a highly advanced pair of sneakers that could be extremely beneficial to people with disabilities. There are a lot of people in wheelchairs who are unfortunately not able to their own shoes. The HyperAdapt is probably their only option as it is the only pair of self-lacing sneakers that are accessible to the mass population. As only a handful of attempts have been made to make a product similar to this one. For example, in 2015, Puma unveiled their version of self-lacing shoes, the Autodiscs, but only fifty pairs were produced and most of them were reserved for athletes like Usain Bolt. Another attempt was by Blake Bevin in 2010, but that was a DIY project that he did it himself.
Technical Description Reflection Essay
The genre of this assignment was a technical description. My goal was to write a simple description of a product of my choosing. My paper was divided into four major sections. First is the overview of the innovation, which describes the general background and history of the product. The second section is the body of the paper which provides a description of all the parts used to manufacture the product. The third section explains how all the parts work together and the last sections conclude the paper by tying all the information provided throughout the description.
When this paper was assigned, I read one of two product description from Ikea and Texas Instruments to get an idea on how they are written. While I was reading, I realized that being an engineering student and becoming an engineer in the future, I may release a product of my own. When I do so, I will need the skill to write a detailed description of the product. This motivated me to write this assignment as it will be extremely useful when I either propose my product to investors or customers.
The purpose of my assignment was to provide a detailed description of the Nike HyperAdapt 1.0 self-lacing shoes. The goal was to tear down the shoes completely and explain each component with as much detail as possible. Also, I wanted my readers to understand what it takes to make a self-lacing shoe work.
The target audience of my paper were people who are interested in learning how an auto-lacing shoe works. The goal was to reach as many people as I could. Whether they were into technology and have some knowledge about it or not. The description was in simple enough language to understand for a person who may not have a technical background.
To make it easier for the readers to follow, I found images of the parts from google, and I then I annotated the images with arrows, the name of the parts and gave it a number. Doing so allowed me to reference the parts in my text and the reader can easily turn to the images and exactly find how the parts look like.
One of the course learning outcomes I achieved through this assignment was the second one which states, “enhance strategies for reading, drafting, revising, editing and self-assessment.” After choosing the product for my paper, I had some idea on how it worked, but I did not fully understand all the aspects of the product. After quick research, I found a few articles with an explanation of how the shoes worked. After reading, I had a pretty good knowledge of the product. After that, I drafted my paper and with the help of peer review in class, I was able to edit and revise my paper, fixing all the errors that were suggested.
References
Telind Bench. Nike HyperAdapt Teardown: The Future is Now (in pieces, on our workbench). Retrieved from http://mindtribe.com/2017/02/nike-hyperadapt-teardown/
Wikipedia. Self-Tying Shoes. Retrieved from https://en.wikipedia.org/wiki/Self-tying_shoes

This entry is licensed under a Creative Commons Attribution-NonCommercial-ShareAlike 4.0 International license.